Table of Contents
Did you know that 86% of marketers use video as an essential part of their work? (Wyzowl, 2024) In the digital world of today, interesting video material rules. It gets people’s attention, gets them involved, and ultimately makes things happen. Here, we discuss how to use Veed.io for video editing.
But what if you need to edit videos for a living? Do not be afraid! Welcome to Veed.io, your one-stop shop for easy online video editing. This cloud-based platform is designed for people in the United States. It has an easy-to-use interface and a lot of powerful tools for changing videos. Veed.io gives you power, whether you’re a new YouTuber, a social media marketing pro, or a small business owner who wants to improve your online profile. With this complete guide, you’ll learn how to turn unfinished footage into polished, professional videos that will wow your audience and elevate your content to a new level.
Navigating Veed.io: Your User-Friendly Editing Hub
Before diving into the editing magic, let’s set you up on Veed.io! Creating an account is a breeze. Head to the Veed.io website and click “Get Started” in the top right corner. Here, you’ll have the option to sign up with your Google account or email address.
Pro Tip: Signing up with Google streamlines the process, eliminating the need to create a separate password.
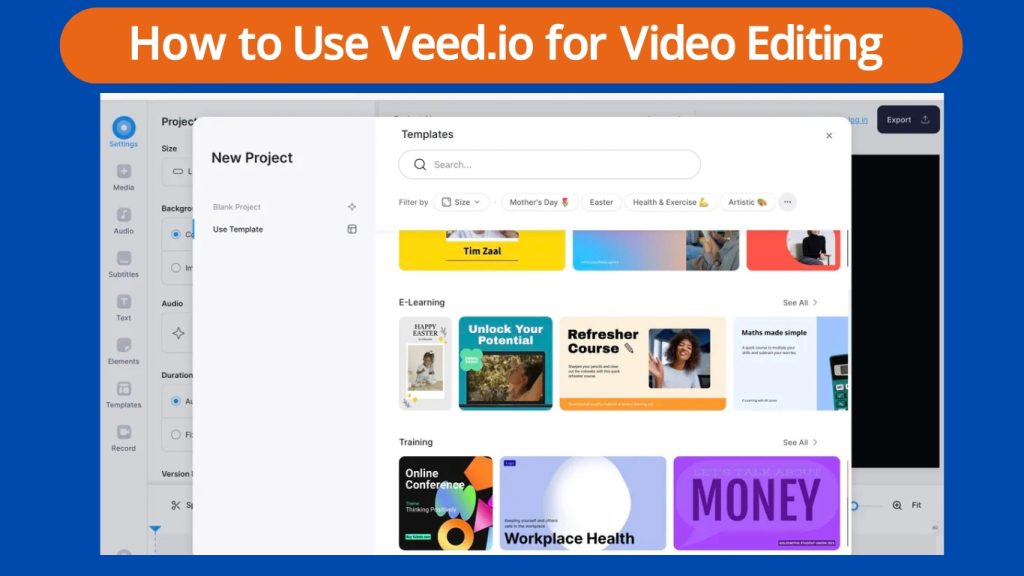
The Veed.io dashboard will greet you once you’re inside. This is your central hub where all the veed.io features are shown. Here’s a breakdown of the key sections:
- Project Bar (Left Side): This panel displays all your current and past video projects. You can easily access and edit any project by clicking on it.
- Editing Canvas (Center): This is where the real fun begins! This is the primary workspace where you’ll upload, arrange, and edit your video clips.
- Editing Tools Panel (Right Side): This vertical bar houses all the editing tools you’ll need to transform your raw footage. Think of it as your virtual toolbox.
Now, let’s explore some of the essential editing tools readily available in Veed.io:
- Trim & Cut: Want to remove unwanted sections from your clips? Use the “Trim” and “Cut” tools located under the “Edit” section in the right panel. Drag the sliders on the clip to precisely define the portion you want to keep or discard.
- Text Overlays: Captivate your viewers with clear messaging! Veed.io offers a variety of text overlay options under the “Text” section. Choose from pre-designed templates or customize your own with fonts, colors, and animations to match your brand aesthetic.
- Music & Sound Effects: Breathe life into your videos with a soundtrack! The “Audio” section lets you upload your music files or explore Veed.io’s royalty-free music library to find the perfect background track. You can also add sound effects to enhance specific moments in your video.
This is just a taste of the powerful editing tools at your disposal in Veed.io. We’ll delve deeper into their functionalities in the upcoming sections, so stay tuned!
How to Use Veed.io for Video Editing
Now that you’re familiar with Veed.io features. Let’s unlock the power of basic video editing!
Importing & Uploading Media
Transforming your ideas into captivating videos starts with adding your media files. Veed.io makes this process incredibly user-friendly. Here’s how to get your content on board:
- Click the big blue “Upload” button in the center of the editing canvas.
- You’ll be presented with three options: “Upload from Computer,” “Upload from Cloud,” and “Record from Webcam.”
- Upload from Computer: Select this option to browse your local files and choose the video clips, images, or audio files you want to edit.
- Upload from Cloud: This option allows seamless integration for those who store media on cloud platforms like Google Drive or Dropbox. Connect your preferred cloud storage service and directly import your files.
- Record from Webcam: Need to capture a quick video message or screen recording? Click this option to utilize your webcam directly within Veed.io.
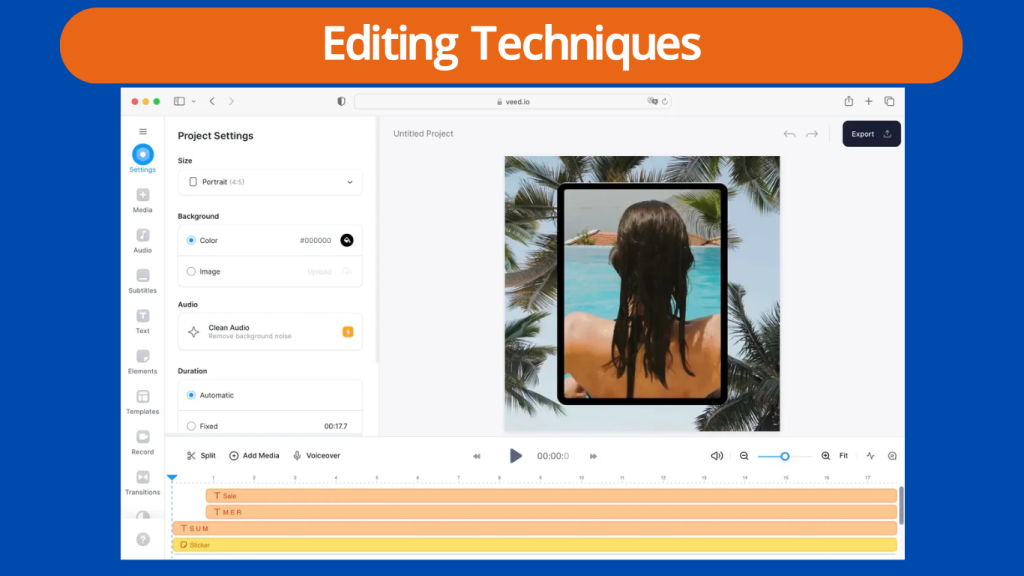
Editing Techniques
Trimming & Cutting
Not all footage is created equal. Veed.io empowers you to refine your clips with precision. Here’s how:
- Drag and drop your uploaded video clip onto the editing timeline.
- Locate the “Trim” and “Cut” icons within the “Edit” section of the right-side panel.
- Trimming: Use the sliders on either end of the clip in the timeline to define the exact portion you want to keep.
- Cutting: Click the “Cut” icon at the desired point on the clip to split it into two segments. You can then delete the unwanted portion or rearrange the segments on the timeline.
Adding Text & Titles
Captivate your audience with clear and engaging visuals! Veed.io boasts a user-friendly text overlay system:
- Click on the “Text” tab on the right-hand side of the panel.
- You’ll be presented with a variety of pre-designed text templates. Choose one that suits your needs, or click “Create Text” for a blank canvas.
- Customize your text with your desired message, font style, color, and animation preferences.
Music & Sound Effects
The fitting soundtrack can elevate your video from good to great! Veed.io offers a robust audio library:
- Click on the “Audio” tab on the right-hand side of the panel.
- Explore Veed.io’s royalty-free music library featuring various genres and moods. Search for a specific track or browse by category. (Pro Tip: Royalty-free music ensures you can use these tracks in your videos without copyright concerns.)
- Alternatively, upload your music files from your computer for a personalized touch.
Pro Tip Section
1. Transitions for a Seamless Flow
Transitions add polish and professionalism to your videos. Veed.io offers a variety of transition effects like fades, dissolves, and wipes. Locate the “Transitions” tab on the right-hand side of the panel and explore your options. Experiment with different transitions to find the best for your video’s style and pace.
2. Voiceovers for Added Impact
Do you want to narrate your video or add specific commentary? Veed.io allows you to record voiceovers directly within the platform. Click on the microphone icon in the top toolbar and hit record to add your voice to your video. This is a great way to provide additional information or enhance the storytelling aspect of your video.
With these basic editing techniques under your belt, you’re well on your way to creating engaging and impactful videos with Veed.io! Stay tuned as we delve into more advanced editing features in the next section.
Sharing Your Masterpiece: Exporting & Publishing Your Videos
Once you’ve meticulously edited your video perfectly, it’s time to share it with the world! Veed.io makes exporting and publishing your creation a breeze.
Exporting Your Video
- Click the blue “Export” button in the editing canvas’s top right corner.
- Veed.io provides various export options, allowing you to choose the format and quality that best suits your needs. Popular formats include MP4, which is universally compatible with most platforms like YouTube, Facebook, and Instagram.
- Additionally, you can customize the video resolution (e.g., 720p, 1080p) based on your target platform’s requirements.
Pro Tip: When exporting for social media, choosing a lower resolution (e.g., 720p) is often recommended to ensure faster upload times.
Sharing Directly to Social Media
Veed.io streamlines the process further by offering built-in sharing options. Directly from the export menu, you can connect your social media accounts (e.g., YouTube, Facebook, Twitter) and publish your video in a single click. This eliminates the need to download and manually upload the video platform.
With your video exported and shared, you’re ready to captivate your audience and achieve your content creation goals! Remember, Veed.io offers many additional features beyond the basics covered here. As you explore the platform further, you’ll discover tools for adding filters, animations, and green-screen effects. So, unleash your creativity, experiment with Veed.io’s functionalities, and take your video editing journey to the next level!
Conclusion
In this comprehensive guide, we’ve embarked on a journey to learn how to use Veed.io for video editing. You’ve learned how to navigate the user-friendly interface, import and edit your media, and ultimately, export and share your polished videos with the world.
Remember, Veed.io is your one-stop shop for effortless video editing, empowering anyone, regardless of experience, to create captivating content. This guide focused on the foundational tools, but Veed.io offers a treasure trove of additional features to explore. The possibilities are endless, from adding dynamic filters and animations to utilizing green screen effects.
Ready to take your video editing skills to the next level? Sign up for a free Veed.io account today and unleash your creativity!
Want to delve deeper into the world of video editing? Subscribe to our blog for regular tutorials and insights that will equip you to become a video editing pro!
With Veed.io by your side, the world of video editing awaits!
FAQs
Q: Is Veed.io free to use?
A: Veed.io offers a free plan with basic editing features. You can consider their paid subscription plans for advanced features and unlimited exports.
Q: What is the difference between the free and paid versions of Veed.io?
A: The free version of Veed.io provides access to essential editing tools. Still, it may have limitations on features like export resolution, file size, and watermarks. The paid plans offer more advanced features, higher export quality, and additional benefits.
Q: Can I edit videos directly on my phone using Veed.io?
A: Yes, Veed.io has a mobile app for iOS and Android devices. You can edit videos directly on your smartphone or tablet.
Q: How do I upload my videos to Veed.io?
A: You can upload videos to Veed.io from your computer, cloud storage (like Google Drive or Dropbox), or even your webcam.
Q: Can I add music and sound effects to my videos?
A: Absolutely! Veed.io provides a library of royalty-free music and sound effects to add to your videos. You can also upload your audio files.
Q: Can I collaborate with others on a video project using Veed.io?
A: While Veed.io doesn’t have a built-in collaboration feature, you can share your project link with others, allowing them to view and provide feedback.
Q: What video formats does Veed.io support?
A: Veed.io supports various video formats, including MP4, MOV, and AVI.
Q: Can I add text overlays and captions to my videos?
A: You can easily add text overlays, titles, and captions to your videos using Veed.io’s text editing tools.
Q: Are there any tutorials or resources available to help me learn how to use Veed.io?
A: Veed.io provides helpful tutorials and resources on their website to guide you through editing. You can also find many online tutorials and communities dedicated to video editing using Veed.io.
Q: What are some of the advanced features offered by Veed.io?
A: Some of the advanced features in Veed.io include green screen effects, motion graphics, video stabilization, and audio editing tools.